


Multifamily community signage has to do more than identify an apartment property at the street. It must help people arrive confidently, find the leasing office, navigate parking and shared amenities, and recognize a consistent brand across every phase of development.
Effective multifamily community signage combines entrance identity, leasing and building identification, parking guidance, amenity wayfinding, accessibility coordination, durable materials, appropriate illumination, and a phased installation plan. Treating these elements as one coordinated system helps developers protect the resident experience while reducing avoidable changes during construction.
The strongest plans begin before fabrication, with a site assessment, brand-alignment review, and evaluation of visibility, lighting conditions, technical requirements, and applicable regulations. From there, each sign has a defined role within the community. That starts with deciding which sign types residents, visitors, vendors, and emergency responders need at each point of arrival and movement.
Get a free quote for your community signage project
What Should Multifamily Community Signage Include?
Short answer: A complete signage program should guide people from the property entrance to the leasing office, building, parking area, amenities, and interior destinations while presenting one consistent community identity.
Developers should plan the sign family as one coordinated environmental system, not as a collection of last-minute signs. The right mix depends on the site plan, visibility, foot traffic, lighting conditions, architecture, resident experience, and applicable city regulations. Early discovery and site assessment help the project team identify those conditions before fabrication begins.
Entrance and monument identity
The primary entrance establishes recognition for residents, visitors, delivery teams, and emergency responders. A monument sign can provide a durable, ground-level identity marker at the main drive. Secondary entrance signs can reinforce the property name and clarify which access point to use. Materials may include aluminum, acrylic, HDU foam, and LED components, selected to support the design intent and expected exposure. Review exterior sign planning for additional guidance on visibility, materials, illumination, and installation considerations.
Leasing-office and building identification
Leasing-office identification should be visible from the arrival path without competing with the primary entrance identity. It may include a building-mounted sign, projecting identifier, or coordinated directional markers. Building and unit markers then carry the system deeper into the property. Each identifier should follow a clear naming and numbering hierarchy so that residents, guests, service providers, and site staff can locate the correct building without relying on verbal directions.
Parking, traffic, and amenity guidance
Parking and traffic signs explain where to enter, exit, park, load, receive deliveries, and find visitor or resident areas. Their placement should be considered alongside drive aisles, sightlines, landscaping, lighting, and changing traffic patterns. Amenity signs identify destinations such as clubhouses, fitness areas, pools, mail facilities, dog parks, and shared outdoor spaces. Directional signs should answer the next practical question at each decision point, rather than repeat the property name.
Interior directories and room identification
Inside the leasing office and shared facilities, directories, reception signs, room identifiers, and directional signs make the experience easier to navigate and more polished. Materials and contrast should complement the community brand while keeping information legible. A coordinated approach to interior wayfinding systems can help connect leasing, amenity, and service areas into the same visual language.
For a multi-phase development or renovation, document every sign location, message, mounting condition, finish, and illumination requirement in the plan. That shared reference gives architects, contractors, property teams, and fabricators a practical basis for coordination as the community grows.
How Do You Build a Signage Plan Around the Resident Journey?

Answer: Map every decision point from the public road to the resident's destination, then coordinate identification, direction, accessibility, illumination, and service information as one connected system.
A successful community signage plan follows how people actually move through the property. A prospective resident may first encounter the entrance from a moving vehicle. A visitor may need to find guest parking and the leasing office. A resident may be looking for a building, amenity, package area, maintenance office, or service point after dark. Each audience needs clear information at the right moment, without visual clutter or conflicting instructions.
Begin with the site rather than a catalog of sign types. Visibility, foot traffic, lighting conditions, traffic patterns, and local regulations all affect what information belongs at each location. Site assessment and surveying can reveal sightline problems, mounting constraints, utility conflicts, and locations where a sign would be hidden by landscaping or architecture. The plan should also account for how signs will be read by drivers, pedestrians, residents, delivery personnel, and emergency responders.
- Document the arrival sequence. Identify the primary approach, entrance decision points, monument or property identity sign, secondary entrances, and any conditions that affect daytime or nighttime visibility.
- Define the leasing-office path. Show how a first-time visitor moves from the entrance to visitor parking, the leasing office, reception, and any required check-in point. Coordinate exterior identification with interior directories and interior wayfinding systems so the experience remains consistent after the front door.
- Map resident and visitor destinations. Organize directions to buildings, parking areas, garages, amenities, mail or package locations, community spaces, and service points. Use a clear hierarchy so people receive only the decision-making information needed at each location.
- Review technical and regulatory conditions. Evaluate proposed locations, mounting, illumination, electrical needs, accessibility considerations, and applicable sign-code requirements. Code analysis and permit preparation should be based on the actual site and jurisdiction, not assumed dimensions or generic templates.
- Test the system before fabrication. Use mockups or 3D visualizations to review scale, placement, materials, brand alignment, and sightlines with the development, design, construction, and property-management teams. Resolve feasibility questions before fabrication and installation begin.
Brand alignment belongs in every step. Property identity, building names, amenity labels, parking instructions, and service messaging should feel like parts of the same environment. A coordinated plan also makes future phases easier to manage because new buildings or amenities can follow an established hierarchy rather than introducing disconnected sign decisions. The result is a more legible property, smoother arrival experience, and clearer operational communication for the teams responsible for serving residents.
Talk with a signage partner about your community plan
Which Materials and Illumination Choices Support Long-Term Performance?
Answer capsule: The right material and lighting combination depends on the sign's location, viewing distance, weather exposure, surrounding light, and maintenance plan. A durable multifamily community signage system should be specified as a coordinated set of components, not selected from a catalog by appearance alone.
Aluminum, acrylic, and HDU foam can each support different design and performance objectives. Aluminum is useful where a strong, lightweight, weather-resistant construction is needed. Acrylic can provide clean faces and controlled color presentation, while HDU foam can support dimensional architectural forms when the design calls for depth. The best choice depends on the sign type, mounting conditions, exposure, and the visual relationship to the property's architecture.
| Choice. | Best-fit use. | Planning consideration. | Performance objective. |
|---|---|---|---|
| Aluminum | Monument structures, panels, and exterior sign bodies. | Confirm structure, finish, mounting, and weather exposure. | Stable construction with manageable long-term service needs. |
| Acrylic | Illuminated faces and crisp identity elements. | Evaluate color, viewing conditions, light diffusion, and access. | Legibility and consistent appearance after dark. |
| HDU foam | Dimensional architectural features and shaped sign elements. | Coordinate profile, finish, attachment, and site exposure. | Depth and visual character without compromising installation planning. |
| LED components | Channel letters, monument signs, and other illuminated applications. | Plan electrical loads, service access, viewing distance, and ambient light. | Efficient illumination with dependable nighttime visibility. |
Channel letters are often built with energy-efficient LED lighting. They can be custom-built for durability, code compliance, weather resistance, and long-term performance. Most LED signs are rated for more than 50,000 hours of use, but that rating is not a guarantee for every installation. Component selection, heat management, electrical work, exposure, and maintenance all influence actual performance. Review LED signage solutions alongside the broader site plan rather than treating illumination as an isolated design feature.
- Entrance monuments: Balance daytime identity, nighttime recognition, structural durability, and visibility from approaching traffic.
- Leasing and amenity signs: Match illumination to pedestrian viewing conditions so the sign remains legible without creating glare.
- Channel letters: Coordinate letter depth, face material, LED placement, electrical access, and the building facade.
- Service planning: Allow practical access for inspection, component replacement, cleaning, and future property updates.
Before fabrication, the project team should review mockups, material recommendations, structural and electrical calculations, and installation methodology. In-house quality control can include material inspection, dimensional verification, electrical testing, and weather-resistance validation. This upfront coordination helps align the finished system with the property's architecture, code requirements, viewing conditions, and expected operating environment.
How Should Accessibility and Code Compliance Shape the Plan?
Answer: Treat compliance as a design input from the first site assessment, not as a final inspection item. The signage plan should coordinate accessibility, visibility, placement, zoning, building requirements, electrical work, and life-safety considerations with the architect, contractor, engineers, and applicable code officials.
A multifamily community signage plan serves people arriving by vehicle, walking from parking, visiting the leasing office, finding a building, or using a shared amenity. That makes placement and legibility operational decisions as well as visual ones. Review sightlines, lighting conditions, pedestrian movement, traffic patterns, landscaping, and likely mounting locations before designs are finalized. A sign that is technically present but hidden by a vehicle queue, tree canopy, glare, or a poorly chosen angle does not provide dependable guidance.
Accessibility review should cover more than the property entrance sign. Identify where accessible room identification, directional information, amenity identification, and other required or advisable communication will be needed. The exact requirements can depend on the building, use, jurisdiction, and project conditions. Use ADA sign requirements as a starting point, then confirm the applicable standards with the project design team and code officials. Do not treat a general reference as a substitute for project-specific review.
Coordinate parking and life-safety signage with the civil, architectural, and site plans. Sign locations should not obstruct accessible routes, conflict with vehicle circulation, interfere with emergency access, or compete with critical instructions. Building identification, directional signs, and amenity signs also need to work as a coherent hierarchy, so residents and visitors can understand where to go without excessive visual clutter.
Permitting belongs in the same workflow. Local sign-code verification and zoning review may affect size, placement, illumination, and visibility. Depending on the project, building permits and electrical permit applications may also be required. Carolina Signs and Wonders supports code analysis, permit preparation, sign-code verification, zoning and regulatory navigation, building permits, and electrical permit applications. Final determinations remain project- and jurisdiction-specific.
Compliance planning checklist
- Confirm the applicable accessibility, building, electrical, zoning, and sign-code requirements with the project professionals and code officials.
- Map accessible room identification, directional, parking, amenity, and building-identification needs before sign locations are approved.
- Review legibility, contrast, illumination, viewing conditions, mounting context, and sign placement throughout the resident and visitor journey.
- Coordinate parking guidance and life-safety communication with civil, architectural, electrical, and emergency-access plans.
- Document permit responsibilities, required applications, design assumptions, and approval dependencies so compliance does not become a late-stage surprise.
- Recheck the coordinated plan when site conditions, building layouts, landscaping, utilities, or construction phases change.
This front-loaded coordination protects the resident experience and reduces avoidable redesign, relocation, and installation risk while keeping the community identity consistent.
How Can Developers Protect Brand Consistency Across the Property?
Protect brand consistency by defining a clear visual hierarchy, documenting repeatable sign families, and applying review controls from discovery through installation. The goal is not to make every sign identical. It is to ensure that every property touchpoint feels like part of the same intentional experience. Whether a resident is arriving at the entrance, visiting the leasing office, locating a building, or using a shared amenity, the system should feel coordinated.
Start with hierarchy, not individual sign designs
Begin by deciding how the brand should read across the property. The primary community identity may belong at the entrance or monument sign. Secondary identification can support the leasing office, residential buildings, parking areas, and amenities. Directional signs should serve navigation without competing visually with the community name.
This hierarchy gives each sign a defined job and prevents visual clutter. It also helps teams make consistent decisions when a new building, amenity, or phase is added later. A strong plan distinguishes high-visibility identity elements from functional information while keeping both within the same design system.
Build sign families around shared design rules
A sign family should establish the elements that make the property recognizable: approved colors, material finishes, lettering styles, logo treatments, illumination approach, mounting details, and information hierarchy. These choices should work in the conditions where the signs will be viewed, including daylight, nighttime lighting, pedestrian traffic, and vehicle approach.
Templates can help maintain consistency for recurring applications, but they should not replace project-specific design judgment. A leasing-office sign may need a different scale or finish from an amenity identifier, even when both use the same lettering and color standards. Designs should be tailored to the client's identity and the site's architecture rather than forcing every application into a rigid format. Developers can review consistent branded signage for additional planning context.
Make the leasing and resident experience part of the brand
Brand standards should extend beyond the entrance. The leasing-office experience, building identifiers, parking guidance, amenity signs, and resident touchpoints should feel coordinated in tone, legibility, and finish. This continuity reinforces confidence for prospective residents and makes the property easier to understand after move-in.
Document controls for phased and portfolio work
During discovery, brand alignment should be addressed alongside site assessment, technical requirements, and feasibility. Create a standards package that records approved artwork, color and material specifications, sign-family drawings, placement principles, illumination notes, and review responsibilities. Include version control so teams know which files are current.
For phased construction or multiple properties, establish approval gates before fabrication and installation. The developer, architect, brand stakeholder, and property operations team should know who reviews each sign family and how exceptions are documented. This process allows necessary site adaptations without creating inconsistent, one-off decisions. It also gives future project teams a reliable reference for extending the identity as the portfolio evolves.
What Does a Phased Multifamily Signage Installation Process Look Like?
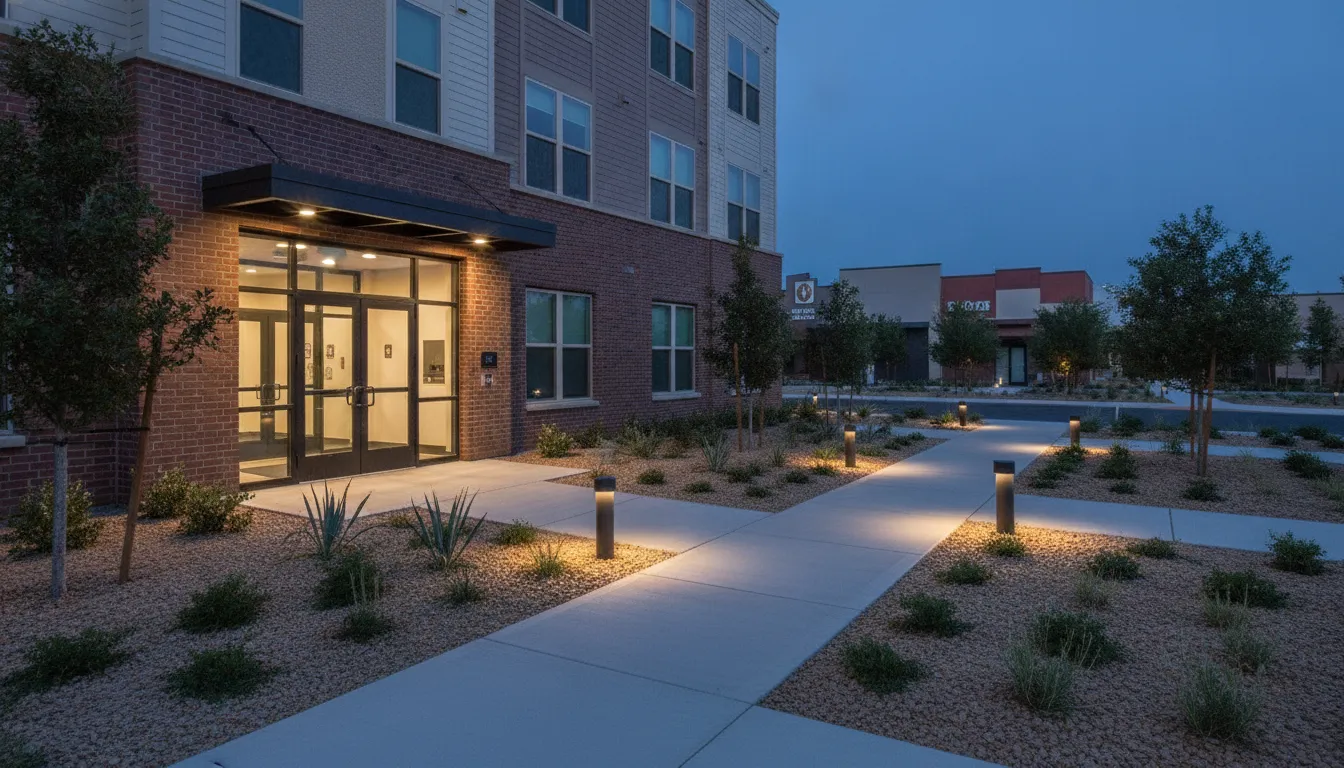
Answer: A phased multifamily signage installation process moves from site discovery and technical planning through design approval, permitting, fabrication, installation, closeout, and ongoing service. The signage partner coordinates each phase with the developer's construction schedule so entrance identity, leasing-office markers, wayfinding, parking guidance, building identification, and amenity signs are ready when each area is ready.
For a community-wide rollout, the process should begin before sign locations are treated as final. Discovery includes a site assessment, detailed surveying, technical requirements gathering, brand-alignment discussions, and feasibility analysis. The team reviews visibility, lighting conditions, traffic patterns, available mounting surfaces, utility considerations, and the relationship between sign locations and active construction. This early assessment gives developers and general contractors a practical basis for sequencing the package instead of discovering conflicts after foundations, paving, landscaping, or electrical work is complete.
Requirements are then documented by sign family and phase. A site plan can identify which entrance or monument elements must be installed first, which building identifiers depend on completed facades, and which interior or amenity signs should wait until those spaces are finished. It should also record dimensions, materials, illumination, mounting conditions, access needs, and approval responsibilities. This level of coordination helps the project team connect sign delivery to construction milestones while keeping the property identity consistent from the first opening phase through later buildings.
Design development turns those requirements into reviewable decisions. Mockups and 3D visualizations can show how signs relate to the building elevations, landscape, drive aisles, and pedestrian routes. Material recommendations, structural calculations, electrical load calculations, code analysis, and installation methodology may be included as the project requires. Designs are tailored to the client's identity rather than selected from a template, which gives developers a controlled way to review hierarchy, visibility, and brand consistency before fabrication.
Permitting should proceed alongside design approvals, not as an afterthought. Carolina Signs and Wonders handles local sign-code verification, zoning and regulatory navigation, building permits, and electrical permit applications as part of project planning. Requirements vary by jurisdiction and site, so the permit package should reflect the approved design, location, construction conditions, and electrical scope for each phase.
Once approvals are in place, fabrication quality control protects the installation schedule. In-house checks can include material inspection, dimensional verification, electrical component testing, and weather-resistance validation. A Charlotte manufacturing facility supports controlled production, while the installation team prepares each site for precise placement and structural mounting. Professional sign installation may require specialized equipment and coordination with site access, paving, landscaping, and other trades. Code-compliant electrical connections are completed through Carolina Commercial Electric, which provides UL-listed electrical capabilities.
Closeout should document installed locations, electrical coordination, approved designs, and any remaining service needs. A single accountable partner across design, permitting, engineering, fabrication, installation, and service reduces handoff risk because responsibility does not disappear between phases. Carolina Signs and Wonders serves complex B2B projects across North Carolina and South Carolina and has completed work across 39 U.S. states as a general capability. Developers can review professional sign installation and turnkey signage services when evaluating a partner for a coordinated rollout.
Request a free quote for coordinated multifamily signage
Frequently Asked Questions
When should signage planning begin for a multifamily development?
Begin during early site and design coordination, before sign locations, electrical needs, foundations, and permitting decisions are locked. A discovery process can include site assessment, surveying, technical requirements, brand alignment, and feasibility analysis. Starting early helps coordinate signage with architecture, utilities, traffic flow, and the construction schedule.
What signs should a residential community plan for?
A complete plan typically addresses the entrance or monument sign, leasing-office identification, building identification, parking guidance, traffic direction, amenity wayfinding, accessibility-related signs, and service or safety communication. The exact sign family depends on the site plan, resident journey, property operations, local regulations, and the level of identity the developer wants to establish.
How can developers make community signage durable and visible at night?
Choose materials and finishes based on exposure, maintenance expectations, visibility, lighting conditions, and the sign's location. Aluminum, acrylic, HDU foam, and LED components may be appropriate in different applications. Illuminated elements should be evaluated for electrical requirements, nighttime legibility, weather resistance, and long-term performance rather than appearance alone.
Who is responsible for permits and code coordination?
Responsibilities should be defined at project kickoff among the developer, architect, general contractor, sign partner, and applicable authorities. A full-service sign partner can support sign-code verification, zoning and regulatory navigation, building permits, electrical permit applications, code analysis, and installation methodology. The final requirements remain project- and jurisdiction-dependent.
Can signage be installed in phases across a new community?
Yes. Phasing can align sign packages with site readiness, building turnover, leasing activity, and construction sequencing. Establish the sign family, approved materials, mounting details, artwork standards, and installation responsibilities before the first phase. That documentation helps preserve a consistent resident experience as later buildings, parking areas, and amenities come online.
Ready to Plan Your Community Signage?
A coordinated signage plan can help align property identity, resident navigation, accessibility, and installation requirements before work begins. Carolina Signs and Wonders can help your team evaluate the full community system and identify practical next steps for a cohesive project.


