


ADA restroom signage is easier to coordinate when teams treat it as part of the complete building sign package, not as a late finish detail. Healthcare, education, government, and commercial facilities teams can reduce rework by inventorying each restroom, coordinating messages and placement with the project team, and resolving applicable accessibility questions before fabrication. This guide focuses on project planning, not a substitute for a site-specific code review.
Discuss your restroom signage project
What should an ADA restroom signage plan accomplish?
A practical plan connects each restroom door to a documented sign, approved message, intended location, construction details, and installation owner. It should give the owner, architect, accessibility professional, contractor, and signage team one coordinated basis for review. That clarity matters in a new building and in an occupied facility where existing walls, doors, and circulation may differ from the drawings.
At minimum, establish:
- A room identifier and sign identifier that match the current drawing set.
- The proposed room name, symbol, and any supporting wayfinding message.
- The location and mounting condition to be reviewed by the responsible design professional.
- Material, finish, tactile elements, visual treatment, and attachment approach for approval.
- Who approves messages, checks applicable standards, verifies field conditions, installs, and records completion.
Think of the schedule as a control document. If a room changes from a single-use restroom to a shared-use space, the relevant message, plan reference, artwork, and installation notes should all be updated together. A note in an email alone can be missed once multiple vendors are working from separate drawing versions.
How should teams inventory restrooms and doors?
Start with a room-by-room inventory, not a quantity estimated from a partial floor plan. Include public and staff areas, each floor, remote wings, shared spaces, and rooms that may be absent from an older directory. Reconcile the inventory with the architectural room schedule and ask the owner to confirm which names should appear to visitors.
For each opening, record the floor, room number, current room name, proposed sign message, drawing reference, door configuration, and review status. Add a note for unusual conditions: a narrow corridor, a nearby handrail, a glazed wall, casework, a recessed entry, or a door that opens into a constrained approach. These notes do not decide compliance. They tell the responsible professional what needs attention before a location is finalized.
Renovation work needs an additional field check. Drawings can show a wall or door that has moved, been replaced, or gained new hardware. Walk the site with facilities or construction staff, compare observations with the plan, and mark discrepancies. Photographing each opening with a room identifier visible to the project team can help resolve questions, but photos should be organized and stored according to the project’s documentation practices.
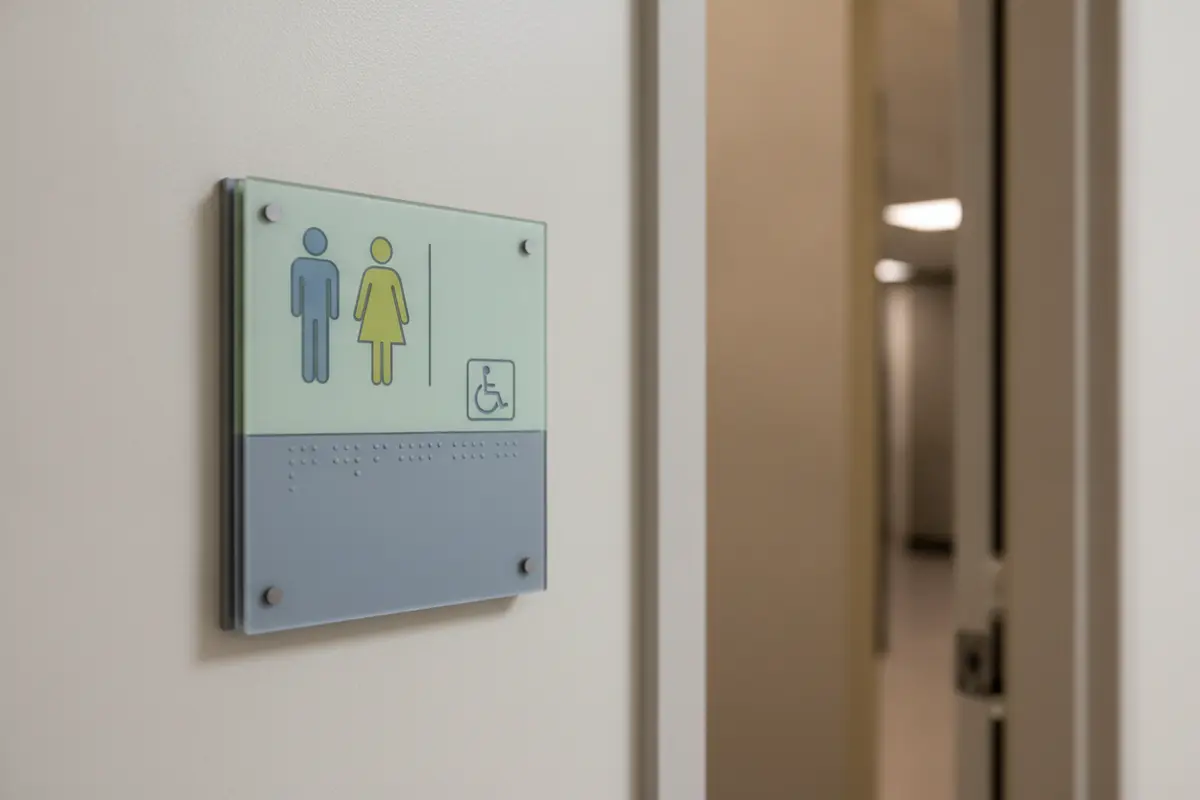
What does a useful room schedule look like?
A schedule need not be complicated to be useful. A shared spreadsheet can include columns for floor, room number, room name, sign type, message, drawing reference, proposed mounting location, material family, approval owner, and status. Use a controlled status vocabulary such as “inventory,” “design review,” “approved,” “field verified,” and “installed.” The project team can then see whether a blank cell means a decision is pending or information is missing.
For a multi-building campus, add building and site identifiers. For a multi-location organization, add the location code and approved standard version. Avoid relying on a single sign schedule for multiple sites if local plans or room names differ. A shared standard can maintain consistency while each site record preserves its own verified conditions.
Which accessibility requirements need project review?
The 2010 ADA Standards for Accessible Design include provisions for signs identifying permanent rooms and spaces. The right details depend on the sign type and the project conditions. Review the 2010 ADA Standards for Accessible Design with the project architect, accessibility consultant, or other responsible professional. A general article or sign sample cannot determine the requirements for a particular opening.
Before artwork is released, ask the responsible reviewer to confirm which signs require tactile characters and Grade 2 braille, what visual character and contrast treatment applies, and what mounting location is appropriate. Record decisions in the coordinated drawings or schedule, including any exceptions or site-specific instructions. Do not assume that a sign is suitable simply because it resembles a sign installed in another facility.
Separate the roles clearly. The signage partner can prepare a schedule, create artwork from approved content, and coordinate fabrication and installation. The design and compliance professionals determine the applicable requirements and approve the project solution. The owner confirms room naming and operational needs. When these responsibilities are explicit, an unresolved technical question is less likely to surface after signs have been produced.
What materials and sign details should the team compare?
Material selection affects appearance, cleaning, durability, tactile construction, and coordination with the facility’s visual system. Compare options in context rather than approving a loose sample without considering the corridor, wall surface, cleaning routines, and adjacent signs. The exact construction should follow the project documents and review process.
| Decision area | What to compare | Useful project question |
|---|---|---|
| Face and substrate | Durability, finish, tactile construction, and expected contact | Will the specified construction suit daily use and cleaning? |
| Visual treatment | Contrast, legibility, finish, and consistency with the sign family | Can the message be read in the actual corridor lighting? |
| Attachment | Wall substrate, surface condition, and proposed fastening method | Has the installation method been checked for this wall? |
| Message system | Room naming, numbering, symbols, and directory references | Does the message match the owner-approved room schedule? |
| Maintenance | Cleaning instructions, replacement process, and spare identification | Can facilities staff care for the sign as intended? |
- Durable, cleanable construction: Ask facilities staff which cleaning practices and products are used, then confirm the proposed finish is appropriate for that environment.
- Legible design: Coordinate color and typography with the interior sign family while preserving the necessary visual and tactile information.
- Suitable attachment: Confirm the wall surface and mounting approach before production, especially where finishes are delicate or walls are irregular.
- Maintainable records: Keep approved artwork, material identification, and room references together so a replacement can be matched later.
A comparison should capture tradeoffs rather than imply that one material is right for every facility. A high-traffic school corridor, a healthcare setting with frequent cleaning, and a low-traffic administrative wing may have different maintenance conditions. Facilities staff can explain daily use; the design team can set visual standards; the signage partner can document what the selected construction requires.
Coordinate restroom identifiers with the broader ADA and wayfinding signage package and other interior office signage. A consistent sign family can support navigation without making every sign identical in function or content.
How do permitting and installation coordination affect the plan?
Interior room signs may be only one part of a larger project that includes exterior identification, illuminated elements, structural work, or electrical coordination. Determine which approvals or permits apply to each scope with the relevant project professionals and authorities. Requirements vary by jurisdiction and project, so do not assume that one approval process covers every sign in a package.
Build a responsibility matrix before the schedule becomes compressed. Name the owner for message approval, drawing coordination, compliance review, any required permitting, fabrication release, site readiness, installation, and closeout. If the project includes electrical or structural components, identify how those scopes connect to the restroom package and who coordinates the interface. This keeps the restroom work visible without suggesting it has the same approval needs as every other sign.
Installation planning starts with approved information and a ready site. Confirm that the room names and locations are final, finished walls are available, access has been arranged, and other trades will not obstruct the planned work. Establish how field conditions will be reported. If the installer finds a conflict, the team should pause the affected location, document it, and obtain direction from the designated reviewer rather than moving a sign by guesswork.

What changes between new construction and renovation?
In new construction, signage can be coordinated alongside room numbering, finish schedules, and construction sequencing. Add sign locations to the relevant coordination set early enough for wall finishes, door swings, and other elements to be reviewed together. Confirm when walls will be ready and whether installation must follow a particular construction milestone.
In renovation, first verify what is actually present. Existing mounting holes, newly installed equipment, door changes, and retained room names may affect the plan. Decide whether old signs will be removed, replaced, or temporarily retained, and document any interim wayfinding needs. If the facility remains open, coordinate access and work timing with operations so installation does not disrupt essential circulation.
For both project types, treat revisions as controlled changes. Record the affected room, reason, approver, updated drawing or artwork reference, and disposition of any sign already fabricated. That simple trail helps the team distinguish a field correction from an unapproved design change.
How can the team prevent rework and missed openings?
Many avoidable problems arise at handoffs: the room schedule changes but the artwork does not, the construction set is revised without updating sign locations, or no one owns final field verification. A short set of checkpoints can expose those gaps before they reach production.
- Freeze the room list for review. Reconcile the architectural schedule, owner terminology, and directories. Mark disputed names instead of guessing.
- Review sign content and applicable details. Route the schedule and artwork to the designated owner and accessibility or code professional.
- Verify locations. Check the coordinated drawings and field conditions, particularly for renovation or constrained openings.
- Approve a representative sample or mockup when appropriate. Review finish, tactile construction, visual appearance, and attachment details against project requirements.
- Release a controlled production set. Identify the approved revision and circulate it to the parties responsible for fabrication and installation.
- Inspect and document installation. Compare installed signs with the approved schedule and record any unresolved or changed locations for review.
Consider a hypothetical campus renovation with several restroom entries across two buildings. The first drawing review identifies room names that differ from the campus directory. The owner confirms preferred names; the design professional reviews the messages and locations; facilities staff verifies the entries in the field. A revised schedule is then issued with a new revision date. If one doorway proves unsuitable as drawn, the team records the condition and requests an approved adjustment before installation. The value is not in adding paperwork. It is in making the next person’s decision traceable.
Another example is a healthcare project where cleaning procedures matter. Facilities staff can identify the routine cleaning environment, the design team can review finish and contrast, and the signage partner can confirm construction and maintenance guidance. By resolving these together before release, the project avoids treating a sample approval as a substitute for operational review.
What should a project brief include before fabrication?
A concise brief lets a signage partner understand the scale, conditions, and approval path without making assumptions. Gather what is available and identify what remains to be confirmed.
- Facility type, project address, building or site identifiers, and whether the work is new construction or renovation.
- Current floor plans, room schedule, room names, and any owner sign standards.
- Approximate sign locations and known field constraints, with relevant photos where appropriate.
- Required coordination contacts for the owner, architect, contractor, facilities team, and compliance review.
- Material, finish, mounting, cleaning, and visual-system preferences already established by the project.
- Project milestones for design review, approvals, fabrication, access, installation, and closeout.
- Related scopes such as interior wayfinding, exterior identification, or signs requiring separate technical coordination.
If some details are unknown, list them as open questions with an owner and due date. For example, “confirm room naming” is actionable when assigned to the owner and tied to an approval milestone. “Signage pending” is not. The brief should make scope boundaries visible, especially where the restroom package is one portion of a larger program.
How should facilities teams select a durable signage partner?
For a complex facility, evaluate the partner’s process as well as the sign itself. The team should be able to work from coordinated project documents, track revisions, communicate clearly with multiple stakeholders, and plan installation around site conditions. Ask who is accountable at each handoff and how decisions are recorded.
- How will you turn our room inventory and drawings into a reviewable sign schedule?
- How will you track message approvals, revisions, field verification, and open decisions?
- What information do you need to coordinate tactile details, materials, and mounting conditions with our reviewers?
- How do you plan installation access and report conflicts found in the field?
- How will restroom identifiers coordinate with directories and the wider interior sign system?
- For multiple sites, how will you preserve approved standards while recording site-specific variations?
- What documentation will the owner receive at completion for future maintenance or replacement?
Carolina Signs and Wonders provides end-to-end signage capabilities, including design, permitting coordination, fabrication, installation, and service. For a broader scope, review its signage services, custom sign solutions, and project portfolio. A clear room list, available plans, schedule, and approval contacts will help frame a useful consultation.
Request a project consultation
Frequently Asked Questions
Does every restroom sign need tactile characters and braille?
Do not assume the answer is the same for every sign or location. The project architect or accessibility professional should determine which signs require tactile characters and braille under the standards applicable to the facility and sign type.
When should restroom signage be finalized?
Confirm room names, messages, and intended locations early enough for design and compliance review before fabrication. Recheck site conditions before installation, especially in renovation work.
Can restroom signs coordinate with a facility’s brand?
Yes. Materials, color, and typography can be coordinated with the broader interior system while preserving required legibility and tactile features. Have the responsible reviewer assess the final design against applicable requirements.
What should we provide for a consultation?
Share the facility type and location, plans if available, room inventory, project schedule, sign standards, and approval contacts. Note whether the work is a new build, renovation, or multi-site program, and identify open decisions.
A well-coordinated plan links each restroom to an approved message, a reviewed sign construction, a verified location, and a clear installation owner. Early collaboration gives facilities teams a more durable, consistent package and reduces unresolved decisions at the job site.


