


A durable cabinet sign project succeeds when the decisions about visibility, construction, mounting, approvals, and installation are coordinated before fabrication. Good cabinet sign planning gives facilities, marketing, property, and construction teams a shared basis for evaluating the sign as one complete system. Rather than treating its face, lighting, and support as separate choices.
Request a consultation for your cabinet sign project
What does cabinet sign planning need to accomplish at the site?
Begin with the job the sign must do. A cabinet sign has a face held within a formed or framed enclosure. Depending on its design, the face may be illuminated from inside or remain unlit. The right configuration depends on the building, viewing conditions, identity standards, and project requirements. It should not be selected from a photograph alone.
Write down the primary audience and viewing situation. Is the sign meant to identify a building for drivers approaching from a particular direction. Help visitors locate an entrance, or reinforce a tenant's identity within a larger property? Note where a person first needs to recognize the organization and what they should understand next. These answers help determine the sign's placement, scale, contrast, and message hierarchy.
Walk the site from the audience's point of view. Record the approach routes, likely viewing distance, direction of travel, nearby visual obstructions, building features, and relevant daytime and nighttime conditions. Photograph the proposed location from the main approach angles. Include enough surrounding context to show the relationship between the sign, facade, landscaping, lighting, and neighboring visual elements. A close-up of a blank wall cannot reveal all of those constraints.
Separate functional needs from preferences. For example, a property manager may need a legible building identifier. While the marketing team is focused on brand color and the construction manager needs a coordinated installation detail. Capture each concern and identify who can approve it. This reduces late changes and provides a clear record when the sign concept is reviewed.
Turn those observations into a short project brief before artwork is developed. State the sign's purpose, audience, primary viewing direction, intended operating hours, and any message that must appear. Add known dimensions and constraints, but label estimates as preliminary. For example, if a building identification cabinet must be seen by visitors turning into a driveway. Identify that approach as the priority rather than assuming every viewpoint has equal importance. A clear brief helps reviewers discuss design decisions against an agreed need.
How does cabinet sign planning guide face and material choices?
The face is the visible surface that carries the message, so it affects appearance, light transmission, color, and service access. The enclosure and face should be considered together. A material that looks suitable in a small sample may read differently when enlarged, illuminated, or viewed against the actual building.
Ask the project team to review these factors before a final face material is selected:
- Viewing distance and detail: Fine lines and small lettering may not remain easy to read at the actual viewing distance. Review the message at realistic scale and from the intended approach.
- Day and night appearance: An illuminated face can present color and contrast differently after dark than in daylight. Review how the proposed colors and artwork will read in both conditions.
- Exposure and upkeep: Consider the sign's exposure to sun, rain, wind, dust, and routine cleaning. Ask how the face is supported and what access is needed to inspect or replace components.
- Brand requirements: Confirm approved colors, logo proportions, clear space, typography, and any rules for adapting the identity to a sign face. Obtain current brand files instead of rebuilding artwork from a low-resolution image.
- Serviceability: Ask how a technician would access the interior, electrical components if present, and face panels. A design that can be serviced in a planned, controlled way is easier to maintain over its life.
Request a material recommendation tied to the project conditions, not just a list of available options. The sign partner should explain why the proposed face, enclosure, finish, and access method suit the application. If the project includes several locations, document the approved specification so each site can be checked against the same standard.
Samples and renderings answer different questions. A physical sample can help the team judge finish, translucency, and surface quality, while a scaled rendering can show how the artwork and proportions relate to the building. Neither should be treated as the complete approval package. Review them alongside the site photographs, design dimensions, and intended viewing conditions. If the sign will be illuminated, ask that the team review how the graphic is expected to appear in both daylight and darkness. And capture any accepted color or contrast choices in the approved artwork.

Which cabinet sign options should a team compare?
Compare complete assemblies rather than choosing a face or lighting method in isolation. A cabinet sign's appearance and service demands come from the interaction between the enclosure, face, illumination, mounting, and site conditions. Use this table to structure an early discussion; the final configuration should be confirmed for the specific project.
| Planning option | What to assess | Best fit questions | Coordination needs |
|---|---|---|---|
| Illuminated cabinet | Nighttime visibility, light distribution, electrical access, and service approach | Does the audience need to identify the site after dark? What appearance is appropriate for the building? | Coordinate power, electrical work, controls if applicable, access, and installation sequencing. |
| Non-illuminated cabinet | Daylight contrast, viewing angle, material exposure, and ambient site lighting | Is available light adequate during intended operating hours? Will the message remain legible? | Confirm face and enclosure materials, mounting, and whether nearby site lighting changes the view. |
| Single-site cabinet | Site-specific proportions, architecture, approach routes, and approvals | Which location and audience define the design? | Verify local requirements, field dimensions, attachment conditions, and access for installation. |
| Multi-location program | Repeatable design rules, local variations, inventory, and approval control | Which elements must stay consistent, and which may vary by property? | Maintain controlled drawings, site surveys, permitting status, and location-by-location closeout. |
In addition to the table, compare proposed configurations against a practical checklist:
- Does the layout support the key message at the real viewing distance?
- Can the sign be mounted without conflicting with known building features or site constraints?
- Is the illumination plan consistent with the intended appearance and practical electrical coordination?
- Can the face and interior be reached for future inspection or service?
- Can the design be repeated accurately across locations while accounting for site-specific conditions?
For a more useful comparison, ask each reviewer to assess the same criteria rather than making a general preference call. A facilities lead can assess access and upkeep, a brand reviewer can confirm identity standards, and a construction manager can identify sequencing or attachment questions. Record the reason for selecting an option and any condition that could change the choice. That simple decision record helps prevent a later review from reopening an issue that was already resolved with project-specific information.
These questions help keep the comparison focused on performance and project fit. They also make it easier for stakeholders to understand why one configuration may better support the facility than another. Teams planning a larger sign package can review Carolina Signs and Wonders' custom sign project information as one point of reference for the broader design and fabrication process.
How do mounting and site conditions affect durability?
Use a site review to turn broad assumptions into items the project team can verify. Measure the proposed area and note nearby edges, joints, architectural features, existing signs, and potential obstructions. Capture the viewing angles that matter, not just the straight-on view. Record whether landscaping, parked vehicles, lighting, or seasonal site changes could affect the sign's visibility. These observations help the designer make a proportionate recommendation and help the installer anticipate access needs.
It is useful to distinguish confirmed information from open questions in the project record. A drawing might show the intended location, while a field visit confirms actual dimensions and access. A building plan may indicate the facade construction, but the project team may still need to verify the conditions relevant to attachment. Listing these items explicitly allows the right person to resolve them before they become schedule or fabrication changes.
For a property with several decision-makers, establish a simple approval sequence. Identify who can approve the sign design, who confirms the mounting approach, who handles property permissions, and who coordinates site access. If a change is requested, route it through the same communication path and update the controlled drawing set. This prevents an outdated rendering or verbal field instruction from becoming the basis for production.
A cabinet sign is only as dependable as its enclosure, support, attachment, and installation conditions. Before approving a design, identify what the sign will attach to and what information is needed to confirm that approach. A photo can help orient the team, but it does not replace field dimensions or review of the actual mounting surface.
Document the proposed location, accessible work area, approximate sign dimensions, nearby building features, and any known restrictions. Flag uncertain conditions for verification rather than treating them as settled. For example, the final attachment method may depend on concealed construction details, facade materials, or access limitations. The responsible project team should determine whether additional review or engineering documentation is needed for the particular installation.
Durability planning also includes how water, dirt, and routine exposure may affect the enclosure and face. Ask how joints, edges, finishes, and access points are designed for the setting. Discuss what maintenance the owner can reasonably support and what conditions should trigger inspection. Avoid assuming that a sign will be maintenance-free; agree on who owns ongoing checks and how service requests will be handled.
For illuminated cabinets, include electrical coordination in the same conversation. Confirm where power is available, who is responsible for the electrical scope, and how the sign can be safely accessed for service. The sign design and electrical requirements should be coordinated before installation is scheduled. A project with multiple trades benefits from one clearly documented sequence and an identified contact for resolving field questions.
A practical site-verification record can make these decisions easier to track. Use a location checklist with separate fields for measured dimensions, mounting-surface observations, access limitations, utilities, viewing photographs, and open items. Assign each open item to a named project role and set the point at which it must be resolved, such as before permit submission or before fabrication release. If a field condition changes, note what drawing or approval may be affected. This creates a traceable handoff between the people who survey, design, fabricate, and install the sign.
What approvals and project documents should be confirmed?
Approval requirements vary by location, property, and project scope. Identify the authority or property representative responsible for reviewing the proposed sign, then verify the applicable submittal process before production. Do not rely on a past approval at another site as proof that the same design or dimensions will be accepted at a new one.
A coordinated project package may need to bring together the following information, as applicable:
- Site photographs and a marked proposed location.
- Sign dimensions, elevations, artwork, colors, and construction information.
- Mounting details and any engineering information required for review.
- Illumination and electrical information for an illuminated configuration.
- Property-owner, landlord, brand, or facilities approvals.
- Permit application materials and a record of comments, revisions, and approvals.
- Installation access, schedule constraints, and points of contact for each party.
Assign an owner for each approval. A property manager may control landlord review, a brand team may approve artwork, and a local authority may review applicable sign requirements. Keep the latest drawing set identifiable and record which version each reviewer has approved. For a multi-site program, track status by location so an approval at one property is not mistakenly applied to another.
Keep a simple submittal log with the site, document version, reviewer, date sent, comments received, and next action. When a reviewer requests a revision, make clear which files changed and whether the revision affects dimensions, appearance, mounting, or electrical coordination. Before fabrication, verify that the approved version matches the production package. This step is especially useful when several properties are moving through review at different rates. Because it prevents one site's comments or approval from being mistakenly carried over to another.
The U.S. Small Business Administration describes business planning as setting out what a business offers and considering its product lifecycle. For a sign program, that broader planning perspective is useful when teams consider how a physical brand asset will be installed, maintained, and eventually updated. See the SBA's business planning guidance for its general planning context. Local sign approvals and technical requirements must still be confirmed for each project.
How can fabrication and installation stay coordinated?
Once the design direction is approved, define the handoff from planning to fabrication. Confirm the final artwork, dimensions, materials, finish, illumination approach, mounting details, and required approvals in one controlled package. Before work proceeds, resolve open questions that could change the face, enclosure, attachment, electrical scope, or installation method.
- Establish site facts. Gather field dimensions, photographs, access information, and known property constraints. Identify anything that still needs verification.
- Develop the sign design. Align the cabinet proportions and graphics with visibility needs, architecture, brand standards, and the selected construction approach.
- Coordinate reviews. Submit the appropriate package to the relevant stakeholders and authorities. Track comments and issue revised documents clearly.
- Release a controlled scope. Confirm the approved version, materials, electrical coordination if applicable, mounting, and project responsibilities before fabrication.
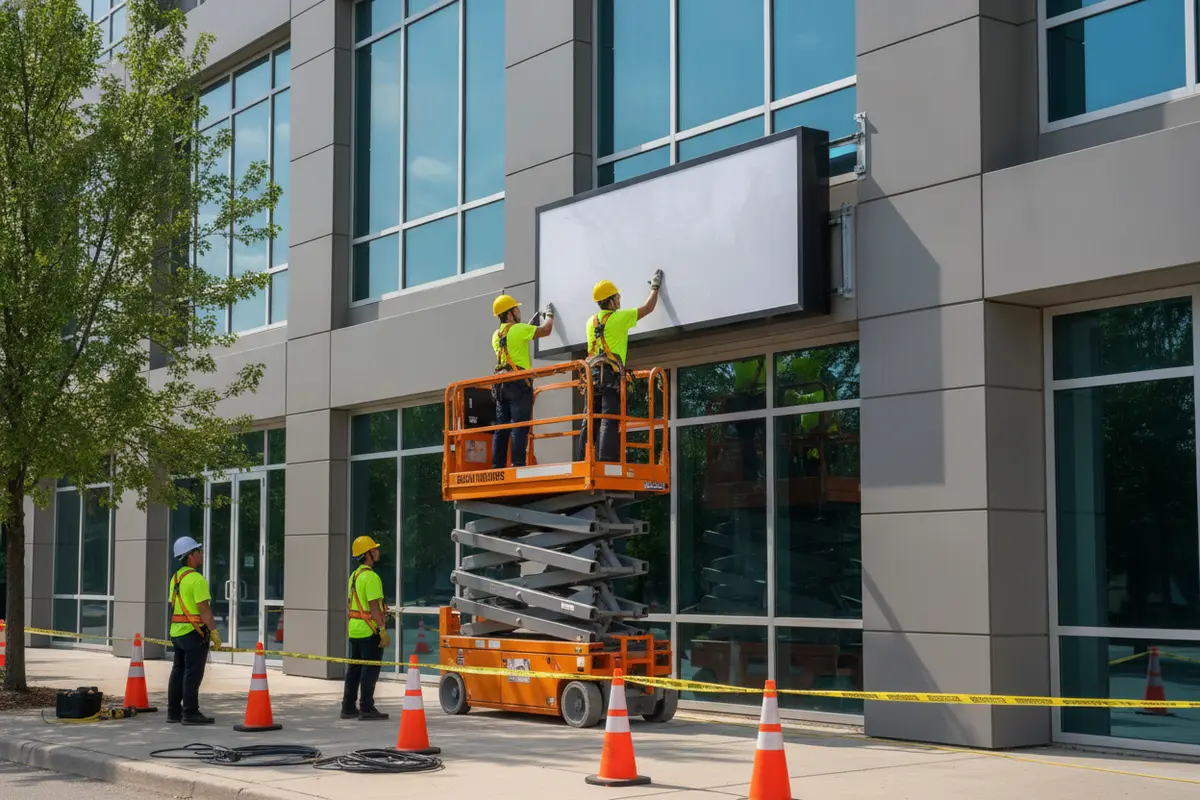
- Plan the installation. Coordinate access, site readiness, trade sequencing, safety planning, and communication with the property contact.
- Close out the work. Record completion, note any follow-up items, and provide the owner with the project information needed for future service.
Installation scheduling should account for the property's operations and the work required at the site. Confirm who will provide access, who can answer field questions, and how changes will be approved. If site conditions differ from the approved plan, establish a pause-and-review process rather than relying on informal direction that may not reach all stakeholders.
Before setting the installation date, run a documented readiness check. Use a short, numbered sequence so the project team can confirm the same conditions at every location.
- Confirm the approved package. Verify that the sign drawings, artwork, dimensions, and revision dates match the current scope.
- Confirm reviews and access. Check that required approvals are complete, the work area is accessible, and the responsible site contacts know the planned sequence.
- Coordinate field work. For an illuminated assembly, confirm how electrical scope, access, staging, and service questions will be handled.
- Set the communication path. If a general contractor or property team controls the work area, agree on who can pause the work, document an unexpected condition, and approve the next step.
These checks do not eliminate every field issue. They give the team a defined way to resolve one without losing control of the approved scope.
For organizations planning several signs or locations, a single project manager or documented communication path can help reduce conflicting instructions. Keep a location-level schedule, review status, and installation record. Carolina Signs and Wonders describes its work as spanning design, permitting, engineering, fabrication, electrical coordination, installation, and service. Teams can review its signage services and commercial sign installation information when assessing a turnkey project partner. For projects that require a broader geographic footprint, the national installation partner information outlines a related area of work.
What should owners plan for after installation?
Closeout is part of a durable sign project, not an afterthought. Decide what records the owner needs and where they will be stored. Useful records can include approved drawings, relevant product and electrical documentation, permit or property approvals, installation notes, and the contact path for service. Keep the final, installed configuration distinguishable from superseded drawings.
Agree on a basic inspection and service approach that fits the sign and site. The owner should know who to contact if the sign face is damaged, illumination changes, attachment concerns arise, or the appearance no longer matches the approved identity. Avoid assigning maintenance responsibilities by assumption. State who handles routine observation, who approves repair work, and how a service request is escalated.
For a multi-location brand, record approved variations and site-specific conditions. A location register can include the sign type, dimensions, installation date, approval status, drawings, and service history. This makes future additions and replacements easier to plan consistently without assuming that every property has identical mounting or approval requirements.
Make the closeout useful to people who were not part of the original installation. Store the final drawings with a clear site name and revision date. Include photographs of the installed sign and its surroundings, and identify the appropriate contact for a service question. If the owner later renovates the facade or changes the brand artwork, these records give the next team a starting point for determining what should be reviewed again. A concise location record can also help facilities staff compare the installed condition with the approved design during routine site checks.
How should a business prepare for a cabinet sign consultation?
A focused consultation begins with the information the team already has, while leaving room to identify what must be verified. Before contacting a sign partner, gather:
- The project address or a list of intended locations.
- Site photographs from the main viewing approaches and the proposed mounting area.
- Approximate dimensions or any existing drawings.
- Current brand artwork and relevant identity standards.
- Whether illumination is required and the intended operating hours.
- Known property, landlord, municipal, schedule, or access requirements.
- The stakeholders who will review the design, approve the project, and coordinate installation.
- Any existing sign details, maintenance records, or project documents that may affect the work.
It is also useful to identify decisions that are open. For example, the team may know that it needs a cabinet sign but still need to determine the face construction or lighting approach. Sharing those questions early helps the project partner recommend a suitable direction and identify dependencies before a final scope is set.
Carolina Signs and Wonders provides information about business signs and examples of completed sign work. Teams evaluating a range of illuminated options can also review its LED signage information. To compare the cabinet sign with related sign formats, consult the company's cabinet sign guide and explore its Charlotte sign services page for regional context.
Request a consultation for your cabinet sign project
Frequently Asked Questions
What information is most useful for a cabinet sign estimate?
Share the project location, intended sign purpose, approximate size, site photographs, brand artwork, illumination preference, schedule, and known approval or access requirements. If some details are unknown, identify them as items to verify rather than guessing. A complete scope depends on site conditions and project requirements, so pricing should be developed through consultation.
Should an illuminated or non-illuminated cabinet be selected first?
Start with when and how people need to see the sign, then evaluate both approaches against the site. Consider nighttime visibility, ambient light, building context, power coordination, service access, and the owner's operating needs. The project team can then confirm a configuration that suits the location.
Can one cabinet sign design be reused at every location?
A common design system can support brand consistency, but each location still needs its own review. Building conditions, viewing approaches, mounting surfaces, approvals, and installation access can differ. Record the shared design rules and verify site-specific details before releasing each location for production.
When should the installation partner be involved?
Bring installation planning into the project early enough to inform site verification, access requirements, mounting details, trade coordination, and schedule planning. Waiting until fabrication is complete to discuss these issues can uncover constraints that affect the approved design or installation plan.
What makes a cabinet sign durable?
Durability depends on selecting an appropriate face and enclosure for the environment. Coordinating sound mounting and installation, planning electrical and service access where needed, and defining ongoing owner responsibilities. A project-specific review is more reliable than choosing materials based only on appearance.
A cabinet sign is a long-term facility and brand asset, so align the design, site conditions, approvals, fabrication, and service plan before production. With clear responsibilities and a controlled project package, your team can make informed decisions and prepare for a coordinated installation.


