

Lobby signs Greensboro NC organizations choose have to do more than identify a name on a wall. They introduce a workplace, support visitor orientation, and set expectations for the rest of the building. For offices, healthcare organizations, schools, and commercial properties, a successful lobby sign starts with a clear plan for brand fidelity, viewing conditions, materials, installation, and the interior signs visitors encounter next.
Request a project consultation
What should a lobby sign accomplish?
A lobby sign is often the first permanent brand element a visitor sees inside a building. It can identify the organization, reinforce a professional environment, and help a guest confirm that they have reached the right place. In a multi-tenant property, it may also clarify which organization occupies the space. Its role should be defined before selecting a material or finish.
Start by agreeing on the sign's primary job. Is it meant to establish a corporate identity at reception, identify a department or institution, or orient people toward reception and other destinations? One sign can support more than one goal, but it should not be expected to solve every wayfinding problem on its own. A strong lobby identity sign and a clear directional system have related but distinct functions.
- Identity: Display the approved organization name, symbol, or other brand elements at the main point of arrival.
- Confirmation: Make it easy for visitors to recognize the right entrance, suite, or reception area.
- Orientation: Connect the lobby to directories, elevators, corridors, departments, and other destinations.
- Environment: Fit the architecture and use of the space without competing with reception, artwork, or other essential information.
Settle the hierarchy among these goals with facilities, marketing, property management, and the people who greet visitors. This avoids a common planning problem: choosing a striking feature sign before confirming what visitors need to understand when they enter.
Make the intended outcome concrete by describing what a first-time visitor should notice and do. A guest arriving for a scheduled meeting may need to recognize the organization name, find reception, and then locate a conference room. A patient may need the check-in destination to be more prominent than a decorative brand message. A campus visitor may need to understand which building or department is represented before consulting a directory. These are different information priorities, even when the same basic sign form is under consideration.
Write a short project brief before discussing design. State the primary audience, the viewing position, the sign's job, and the next piece of information a visitor will need. Then identify what the lobby sign should not do. Keeping the identity panel focused can prevent too much copy, multiple competing logos, or unrelated instructions from crowding the main arrival point. This brief gives stakeholders a shared reference when material or design options are compared.
How do you translate brand standards into a physical sign?
Gather the current brand standards before sign design begins. Useful inputs include vector logo artwork, approved colors, typefaces, spacing rules, minimum-size guidance, and examples of permitted logo treatments. Identify which elements are mandatory and where the design team may adapt the presentation to the wall and viewing distance.
A logo that looks balanced on a screen may need careful scaling and spacing when made as dimensional letters or applied to a textured surface. Do not redraw a logo from a low-resolution image or substitute a similar typeface without approval. Confirm the final artwork, color references, overall dimensions, and relationship between the symbol and lettering with the brand owner before fabrication.
Consider the visual relationship between the lobby sign and its surroundings. Wall color, lighting, reception furniture, ceiling height, nearby glazing, and architectural finishes all affect legibility and appearance. A sign may need contrast against the wall, a controlled finish that does not create distracting glare, or a layout that remains clear from the entrance. Use a site photograph or measured elevation to review the proposed placement in context.
For organizations with multiple facilities, define the parts that must remain consistent and the parts that can respond to each site. Standardizing logo proportions, colors, letter style, and sign hierarchy supports brand fidelity. Allowing a controlled range of sizes, mounting approaches, or background treatments can account for different wall dimensions and architectural conditions. A repeatable specification helps teams review later locations without restarting every design decision.
Separate content approval from appearance approval. First check the actual name, spelling, logo version, and any required department designation. Then assess layout, scale, material, color, and relationship to the room. This division is useful when different people own the brand and facility. The brand owner can confirm identity elements, while the facilities or design team can evaluate placement and site fit. Mark the approved revision clearly so later comments do not bring back an outdated logo or layout.
Scale is easiest to assess in context. A small rendering on a computer screen can make a proposed sign seem larger or more legible than it will be on a broad wall. Review a measured elevation, a photograph with the proposed sign overlaid, or a paper mockup at approximate size. Ask reviewers to look from the entrance and from the place where visitors pause, not only from directly in front of the wall. The goal is to test the sign in the actual viewing situation, not simply to approve an attractive close-up. If the sign has several elements, make sure the organization name remains easy to distinguish from a distance and that spacing between elements still feels intentional at full scale.
Which materials and construction approaches should you compare?
Material selection should follow the design intent, mounting surface, expected viewing distance, cleaning routine, and overall building environment. Compare options as complete assemblies, not just as finish samples. The substrate, edge treatment, mounting hardware, lighting, and wall condition all influence the result.
| Approach | Visual character | Questions to resolve | Often considered for |
|---|---|---|---|
| Dimensional letters | Raised lettering creates depth and a defined edge. | How will letter depth, spacing, color, and mounting method work with the wall? | A prominent identity feature behind or near reception. |
| Flat panel with applied graphics | A contained sign face can organize multiple brand elements. | What panel finish, edge detail, and attachment method suit the interior? | A defined identity area or a location where a panel is easier to coordinate. |
| Direct-applied lettering or graphics | Graphics sit close to the wall with little projection. | Is the wall smooth and prepared, and can the surface support the chosen application? | A clean, integrated treatment where wall condition and maintenance are suitable. |
| Illuminated sign elements | Lighting can add emphasis and visibility in the intended setting. | Where will power come from, how will wiring be concealed, and what controls or service access are needed? | A feature location where lighting is part of the approved design. |
- Dimensional letters: Consider these when a defined edge and visible depth are central to the design. Check how shadows, letter spacing, and the wall's texture affect the look from normal approach angles.
- Panel construction: Consider a panel when the content needs a clear boundary or several elements need to sit together. Confirm its perimeter, thickness, surface finish, and how the edges relate to nearby architectural details.
- Direct application: Consider graphics close to the wall when the surface is appropriate and a low-profile appearance is wanted. Wall preparation and surface condition should be reviewed before the approach is approved.
- Illuminated elements: Consider lighting only after reviewing the desired effect, electrical coordination, wiring route, controls, and future service access. It should support visibility rather than create glare or compete with ambient lighting.
This comparison is a starting point, not a substitute for reviewing the actual site. Material samples can look different under the lobby's lighting than they do in a showroom or on a screen. Review samples alongside the wall finish and nearby materials where possible. Check that the selected construction can be installed securely and maintained using the building's normal procedures.
Include operational considerations in the decision. Ask who cleans the wall and sign, what products are used, whether facilities teams need access behind a panel, and how a future brand update could affect the installation. For illuminated elements, include electrical coordination and access for service in the plan. A good specification describes the whole installation clearly enough for stakeholders to review before fabrication.
Think through trade-offs using actual project conditions. A dimensional treatment can add depth but may require a mounting method suited to the wall and a layout that does not cast distracting shadows. A panel can simplify the grouping of a symbol and organization name, but its size and edge detail must be intentional. A direct-applied design may integrate closely with a finished wall, but it relies on a suitable surface and careful preparation. An illuminated treatment introduces power and service questions that a non-illuminated sign does not. The right choice is the one whose appearance and installation requirements fit the site, not the option with the most features.
Ask for proposed materials and finishes to be identified by name or specification in the review set. General descriptions such as a metallic appearance or a dark finish may leave too much room for interpretation. Document color references, gloss or sheen expectations, panel thickness where applicable, letter depth, edge finish, mounting approach, and illumination details. This record gives approvers a shared basis for decisions and reduces ambiguity when the approved design moves into fabrication. Review samples under the lobby's actual lighting when possible, since daylight and overhead fixtures can change how colors and reflections appear.
How should the lobby sign fit the wider interior sign system?
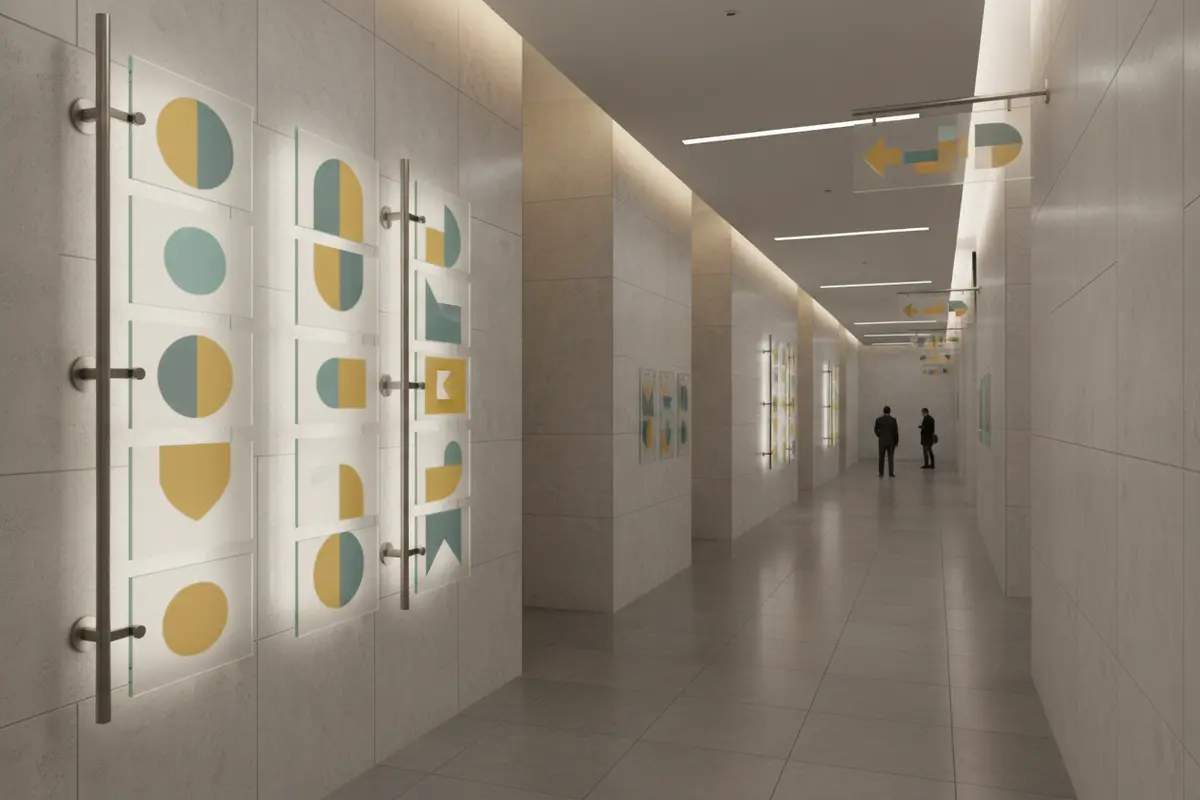
Visitors do not experience a lobby sign in isolation. They may next look for a directory, elevator, meeting room, patient check-in, office suite, or campus department. Plan the identity sign alongside the visitor's route so the name at reception and the signs beyond it provide a coherent sequence of information.
Map a typical arrival path for each important visitor group. A client arriving for a meeting may need a reception cue and room directions. A patient or family member may need a clear route to check-in. A student or campus visitor may need a directory that distinguishes buildings, floors, and departments. These needs can be different, so confirm who uses the space and what questions they are likely to have at each decision point.
Use a consistent visual system across the lobby and adjacent spaces. This does not mean every sign must be identical. Names, typography, colors, directional conventions, and information hierarchy should work together. Review the lobby identity with any office signage, directories, room identification, or wayfinding planned for the same project. For a broader scope, a coordinated office and corporate signage plan can help stakeholders see how reception connects with the rest of the interior.
Accessibility and local requirements also belong in early planning. Requirements depend on the sign's function, location, and applicable codes, so avoid assuming that one detail applies to every sign. Confirm relevant requirements with the project design and compliance team. The Sign Research Foundation's overview of sign regulations in multiple communities and environments provides context on how local sign rules can vary; it is not a substitute for checking requirements for a particular Greensboro project or determining which rules apply to an interior sign.
Test the system with a short arrival walk. Ask someone who does not work in the building every day to follow the route to an intended destination using only information they can see. Note where they pause, turn the wrong way, or ask for help. This can reveal whether the lobby identity sign needs to be paired with a directory, a reception cue, or a directional sign farther along the route. It also helps separate a sign's branding role from the wayfinding information visitors need afterward.
Keep naming consistent at each step. If the lobby sign uses one name for a department and the directory uses another, visitors may wonder whether they are looking for the same place. Coordinate approved department names, abbreviations, floor references, and destination labels before signs are produced. For a property with several occupants, establish who approves tenant identification and how the shared directory relates to each organization's lobby identity.
What site conditions should be checked before design approval?
Verify the physical conditions where the sign will be installed. A planned location can change when the project team discovers a wall joint, glass partition, concealed service, finish transition, or mounting limitation. A site review helps the designer and installer coordinate the sign with the actual building rather than relying on assumptions.
- Wall dimensions and finish: Record usable width and height, surface material, texture, color, and any changes in plane.
- Viewing angles and distance: Check where visitors enter, wait, and approach reception. Consider whether furniture or doors obscure the sign.
- Lighting: Note daylight, overhead fixtures, reflections, shadows, and any planned feature lighting.
- Mounting conditions: Confirm the wall construction and how the sign can be attached securely. Coordinate with the construction or facilities team when necessary.
- Power and access: For illuminated signs, identify the source of power, concealed wiring route, switching, and access for future service.
- Building coordination: Confirm property approvals, work hours, access procedures, protection requirements, and the correct installation area.
Capture measurements and photographs from more than one viewing position. Mark the proposed sign size and location on an elevation or image for review. If other trades are still working, identify which conditions must be rechecked before installation. The process for commercial sign installation depends on site readiness, access, mounting needs, and coordination with the building team.
Use a simple site record to connect measurements with the design. Label each photograph with the direction it faces, the wall or room, and a reference measurement. Record obstacles such as a thermostat, access panel, wall protection, or planned furniture. If the wall finish is not complete, document the expected finish and identify who will confirm it before fabrication or installation. This prevents a visual mockup from being approved against a condition that will not exist when the sign is installed.
Check the visitor's sightline as well as the wall. A reception desk, plant, open door, column, or queue area can partially hide a sign from the entrance. Consider whether visitors approach from one direction or several, and whether the sign remains visible while they wait. For a sign intended to be seen from a corridor, make sure the proposed location is not only attractive head-on but also legible at the angle from which people will encounter it.
When the project is part of a renovation, assign responsibility for confirming changing site conditions. The architect or general contractor may control finish information; facilities may know building access and operating constraints; the sign team may need a final measurement after the wall is complete. Put the check into the schedule rather than relying on someone to remember it informally. If site conditions change, route the change through the approval process so size, materials, mounting, and schedule can be reviewed together.

How can the project team coordinate design, approval, and installation?
Lobby signage often involves several decision-makers. Marketing may own the brand standards, facilities may know the wall and building rules, a designer or architect may manage interior finishes, and property management may approve work in shared areas. Name a project lead who can collect decisions and keep the approved version current.
- Set scope and ownership. Confirm the sign's purpose, location, audiences, related interior signs, and the person responsible for final approval.
- Share project information. Provide approved artwork, measurements, finish schedules, site photographs, building rules, access details, and any relevant construction drawings.
- Review a design in context. Check scale, placement, brand fidelity, color, viewing angle, and relationship to reception and other interior signs.
- Resolve compliance and property questions. Ask the appropriate project professionals to identify applicable accessibility, building, electrical, and property requirements for the specific scope.
- Approve the final specification. Document materials, dimensions, finishes, mounting, lighting if applicable, and installation location before fabrication.
- Confirm site readiness. Coordinate completed wall finishes, access, work hours, safety procedures, and any work by other trades.
- Plan closeout and service. Identify who receives installation details, care guidance, and the contact path for later inspection or repair.
Build review time into the project schedule. Brand approval, property review, finish selection, site verification, and trade coordination can each affect the installation date. Agree on who can approve each item and how revisions will be recorded. A single documented approval set helps prevent a late change to artwork, dimensions, or finish from reaching fabrication unnoticed.
For a project with several stakeholders, maintain a decision log with the question, the decision owner, the due date, and the approved answer. Separate decisions that can be made independently, such as confirming the final logo file, from decisions that depend on a site survey or electrical plan. This gives the project lead a clear view of unresolved items and reduces the risk of treating silence as approval. When a revision affects dimensions, finish, or installation conditions, circulate the updated drawing to the people responsible for those parts of the project.
For organizations coordinating signs at more than one facility, decide whether sites will use a common specification, local adaptations, or a mix of both. Track each location's approved artwork, measurements, finish, and installation status. Carolina Signs and Wonders provides signage services across project stages, including design, permitting, fabrication, installation, and service. Teams planning a wider interior package can also review custom sign options as part of an integrated scope.
Scheduling should account for dependencies, not just a target installation day. Approved artwork may depend on a brand review; the mounting plan may depend on confirmed wall construction; illuminated components may require electrical coordination; installation may depend on the room being clear and accessible. List those dependencies and their owners. Then set a sequence for design review, site verification, property approval, fabrication readiness, installation access, and final inspection. If the building has restricted operating hours or a busy public schedule, surface those constraints early so the team can plan around them.
For phased renovations or multi-site programs, use a location tracker rather than one general project status. Record the local contact, site readiness, approved design revision, outstanding approvals, installation window, and closeout status for each location. This makes it easier to spot repeated questions and preserve the approved system while recording site-specific differences. A standard package should clarify what can vary and who must approve an exception.
What should you prepare before requesting a project plan?
A focused information package makes it easier to discuss the right solution. You do not need every detail resolved before an initial conversation, but share what is known and identify open questions. This gives the project team a better starting point than a logo file alone.
- Project address and the name of the building or organization.
- Sign location, approximate dimensions, and photographs of the wall and entrance approach.
- Approved logo files and brand standards, including any required color or spacing rules.
- Wall finish, construction status, and information about mounting or electrical access if available.
- Visitor needs and any planned directory, room identification, or directional signs nearby.
- Desired project milestones, building access constraints, and the stakeholders who must approve the design.
- Any known property, construction, accessibility, or code review requirements, along with the person responsible for confirming them.
Before a consultation, identify conditions that are unknown. Note that the final wall finish is pending, the building manager has not confirmed work hours, or the brand team still needs to provide vector artwork. Separate known facts from assumptions. This lets the project team recommend the next useful step without treating an early estimate or sketch as a final specification.
If you are comparing approaches, describe the priorities in order. A team may care most about matching a corporate identity, preserving a quiet architectural look, making an arrival point easy to recognize, or coordinating one sign with a larger interior program. Naming the priority helps focus review. Share what is already planned for the space, such as reception furniture, a directory, room identification, or a renovation phase, because those elements influence placement and sequence.
When site details are not yet available, note what needs confirmation and who can provide it. A signage partner can help identify the information needed to move from concept review to a defined scope, while the project team confirms approvals and site-specific requirements.
Discuss your Greensboro lobby sign project
Frequently Asked Questions
When should lobby signage be planned in a renovation or new build?
Bring it into the interior planning process before wall finishes, electrical work, and furniture placement are final. Early coordination gives the team time to confirm the sign location, mounting conditions, power needs if applicable, and how the lobby connects to the rest of the interior sign system.
Should a lobby identity sign include directional information?
It can, but the identity sign and wayfinding have different jobs. Keep the organization name clear at the point of arrival, then use directories or directional signs to guide visitors to destinations. Consider the route as a whole so that each sign answers the next question a visitor is likely to have.
How do we choose between dimensional letters and a panel?
Compare the desired appearance, wall surface, mounting conditions, artwork, maintenance needs, and the surrounding interior. Dimensional letters create depth, while a panel can provide a contained surface for several elements. Review samples and a placement mock-up in the actual space before approving the final approach.
What information helps with a project estimate?
Share the location, sign dimensions or approximate scale, approved artwork, photographs, material preferences, installation conditions, and project schedule. Note whether lighting, property review, or other interior signs are part of the project. A project-specific consultation is needed to define scope and provide an accurate quote.
How can a multi-location organization keep lobby signs consistent?
Set shared rules for logo use, color, typography, information hierarchy, and approved materials, then document each site's dimensions and conditions. A controlled specification can preserve the brand while allowing measured adaptations for different walls, lighting, or building layouts.
Request a consultation for your interior signage
A well-planned lobby sign connects brand identity with visitor needs and the conditions of the building. Confirm the design, site details, approvals, and installation plan together so the finished sign feels intentional and works with the interior around it.


