


Planning monument signs in Greensboro, NC takes more than choosing a sign face. For property owners and project teams, a successful project coordinates visibility, site conditions, structural design, local review, electrical work, fabrication, installation, and future maintenance. Addressing those decisions together helps protect the property's identity and avoid late design changes.
Request a project consultation
Monument Signs Greensboro NC: What role should one play at a property?
Short answer: A monument sign identifies a property or entrance at ground level and should be planned as part of the site architecture, landscape, and visitor path.
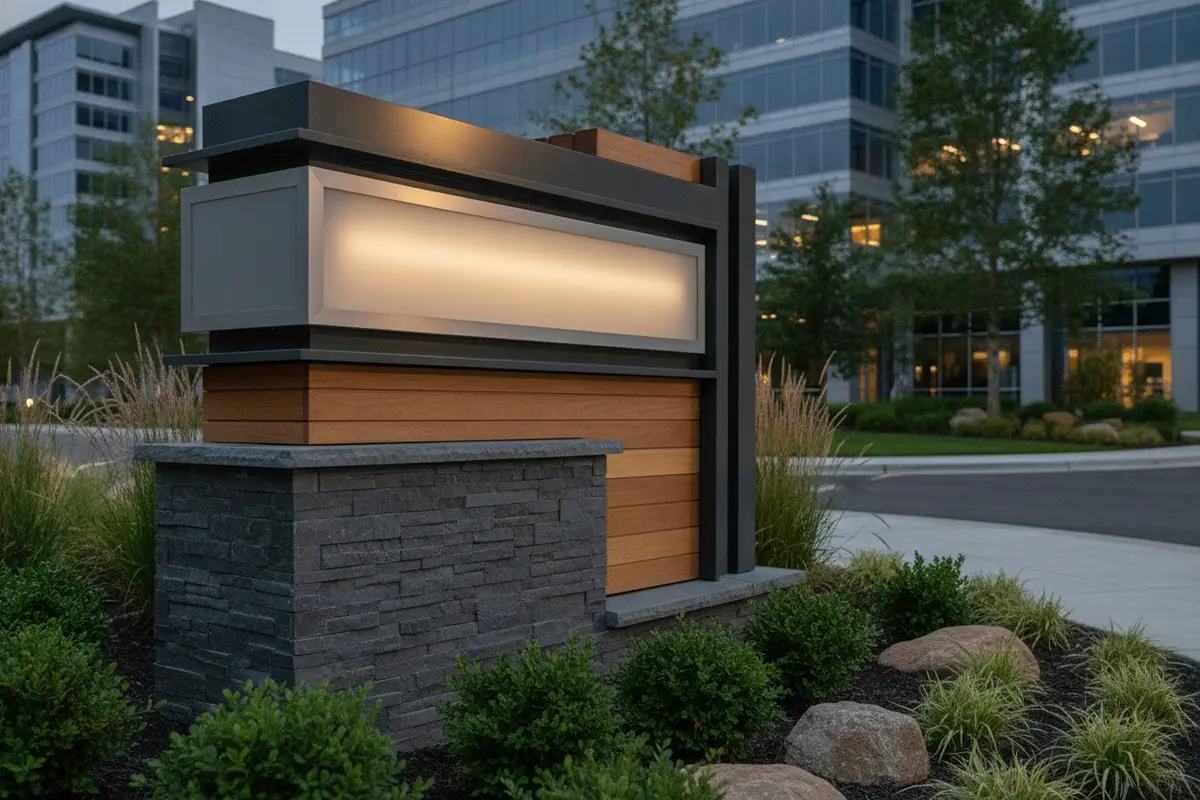
A monument sign is a ground-level identification sign placed near a property entrance. Compared with a sign mounted high on a pole or directly on a building, its lower profile can create a strong sense of arrival while keeping the message connected to the landscape and architecture. Businesses, campuses, medical facilities, municipalities, and mixed-use developments may use one to identify a destination from the road or mark the main entrance.
Start by defining the job the sign must do. Is it intended to identify one organization, list several tenants, direct visitors to a campus entrance, or reinforce a larger brand system? A sign designed for a single occupant has different content and update needs from a shared property sign. Establishing the purpose early informs the size, layout, structure, illumination, and future flexibility.
Monument signage is a permanent site feature, so it should relate to the full property rather than being treated as an isolated graphic. Consider the approach road, driveway geometry, building architecture, landscape plan, pedestrian routes, and other signs. The sign should help a first-time visitor understand where to enter without competing with necessary traffic or pedestrian information.
How do you assess visibility and site conditions?
Short answer: Start with real approach routes, sightlines, obstructions, setbacks, and maintenance access before selecting the sign size or location.
Begin with the viewer's point of view. Walk or drive the approach from the directions visitors will use, and note where the property becomes visible, where a driver can safely read a message, and where a turn must be made. A sign that looks prominent in a rendering may be obscured by a curve, parked vehicles, trees, a grade change, or nearby development when viewed from the actual road.
- Approach and sightlines: Identify the principal approach routes, decision points, and likely obstructions. Consider how the sign reads from a vehicle as well as from pedestrian paths.
- Setback and placement: Coordinate the location with property boundaries, driveway access, utilities, drainage, landscaping, and future site work. Verify applicable restrictions before fixing a sign location.
- Scale and legibility: Judge the sign in context. Letter height, contrast, message length, viewing distance, and the speed of approaching traffic all affect readability. Avoid solving visibility by adding unnecessary copy.
- Context: Review neighboring buildings, existing signs, and the intended architectural character. The sign should be easy to identify without overwhelming the property entrance.
- Maintenance access: Plan for safe access to lighting, electrical components, and replaceable panels. Include room for service work without disrupting normal site activity.
Document the observations with site photographs, a basic site plan, and notes about the viewing direction. Where a project has multiple entrances or several tenant destinations, map the visitor journey before selecting the final sign location. A thoughtful site review can reveal that a single sign is not enough, or that a secondary directional sign is needed to make the entrance sequence clear.
Make the observation specific enough to guide design. Record the approach direction, approximate point where the sign first becomes visible, distance to the driveway decision, background behind the sign, and any visual competition. Photograph the same view at more than one point along the approach. This makes it easier for the designer, owner, and reviewer to discuss the same conditions rather than interpreting a single close-up image.
Check the setting at the times when the sign will be used. A campus entrance may have a different pattern of activity at class changes or shift transitions than during a quiet site visit. Existing streetlights, headlights, storefront lighting, and seasonal landscaping can influence what stands out. Consider whether a visitor will need only the property name or must also distinguish one entrance from another. Do not add more wording than the viewing situation allows; use a separate directional system if visitors need additional guidance after turning into the site.

Which monument sign design fits the property?
Design decisions should connect the sign to the building and to the way the property is used. Begin with the overall form and proportions, then choose face materials, colors, typography, and illumination. A durable design is not necessarily complicated. A restrained palette and a clear hierarchy often remain legible as tenants, landscaping, and surrounding properties change.
Consider how the sign will look in different conditions. Daylight reveals color, texture, and contrast. At night, illumination can change the apparent brightness and balance of the design. Landscape growth, seasonal conditions, and nearby lighting also affect the sign's presence. Review the design at realistic viewing distances and, when illumination is planned, request a rendering that shows the intended nighttime effect.
For a multi-tenant property, create a hierarchy before fitting names into the sign face. Determine whether the property name, anchor tenant, or tenant directory should receive the greatest emphasis. Set rules for panel size, typography, logo use, and future tenant changes. This reduces the chance that later revisions undermine the original brand presentation.
For a single-organization sign, align the sign's proportions and finishes with the building identity system. If the property is part of a larger portfolio, document approved colors, logo proportions, materials, and illumination standards so future locations can follow the same design intent. Carolina Signs and Wonders' custom sign design and fabrication capabilities can support a coordinated approach across a project.
How should you compare structure, materials, and illumination?
There is no single material or construction method that suits every site. The right specification depends on the desired appearance, structural demands, exposure, maintenance plan, electrical requirements, and review constraints. Treat the following as planning categories, not a substitute for project-specific engineering and material selection.
| Option or decision | What it can support | Key planning question |
|---|---|---|
| Masonry or stone finish | A substantial architectural presence that can relate to building materials | Can the site and engineered structure support the intended mass, and how will joints and finishes be maintained? |
| Metal cabinet or formed elements | Clean edges, controlled proportions, and adaptable sign faces | Which finish, attachment method, and access details suit the exposure and service plan? |
| Changeable tenant panels | Updates to occupant names without rebuilding the entire sign | Who approves changes, and can panels be replaced safely and consistently? |
| Non-illuminated face | Daytime identification where ambient light is sufficient | Will the message remain visible during the hours the property is used? |
| Internally illuminated or externally lit sign | Visibility after dark, subject to design and applicable review | What electrical, brightness, access, and operating requirements need to be coordinated? |
Use this comparison to frame design conversations, then evaluate the actual site. A stone-look finish may achieve the architectural effect without the weight or construction approach of a solid masonry element. Metal may allow precise detailing and replaceable sign components. A tenant panel system can make updates more manageable, but it still needs a coherent layout and a defined process for changes.
- Prioritize permanence: Choose an assembly and finish suited to the expected exposure and the owner's maintenance capacity.
- Plan for access: Locate service access and electrical components so technicians can reach them safely.
- Coordinate illumination: Decide how the sign should appear after dark, how light sources will be integrated, and how the result will be reviewed before fabrication.
- Think about replacement: Determine which elements could need replacement during the sign's service life, including tenant panels, faces, or lighting components.
Lighting should serve legibility, not become the message. Specify the intended effect and test the visual hierarchy in both day and night views. Excessive brightness, poorly controlled spill, or uneven illumination can distract from the property and may conflict with project requirements. Electrical design and installation should be coordinated with qualified professionals as part of the overall sign scope.
Monument Signs Greensboro NC: What should project teams know about permitting?
Short answer: Confirm the property jurisdiction and current sign, zoning, building, and electrical requirements before releasing drawings for fabrication.
Do not assume that a sign design approved by an owner or architect is automatically ready to build. Sign rules can address location, dimensions, construction, illumination, and other details. The City of Greensboro's sign information page explains that the city's Land Development Ordinance authorizes regulation of signage. Project teams should use the current city requirements and confirm which approvals apply to the particular property and sign.
First establish the property jurisdiction and identify the relevant reviewing authority. A mailing address alone may not settle which rules govern a site. Confirm whether the property falls within the City of Greensboro or another jurisdiction, then verify applicable sign, zoning, building, electrical, and site requirements with the appropriate authority. Requirements can vary with the property and proposed work, so avoid relying on a rule of thumb from another project.
Prepare a coordinated package before submission. Depending on the project and authority, the review may call for a site plan, sign elevations, dimensions, materials, lighting information, structural documentation, or electrical details. Confirm the specific submittal list rather than assuming every project requires the same documents. If a revision is requested, track the comment, responsible reviewer, updated sheet, and approval status so design and production teams are working from the current set.
Permit planning belongs near the beginning of the schedule. A late change to location, dimensions, foundation, or lighting can affect drawings, costs, procurement, and installation sequencing. Assign an owner for permit coordination, record submission and review milestones, and do not release work for fabrication until the required approvals and construction information are sufficiently resolved.
Build a simple responsibility matrix for the review process. Name the person who gathers property information, the design lead who prepares sign drawings, the party who submits the application, and the stakeholder authorized to approve any requested change. Maintain one current drawing set and log each submission, response, revision, and resubmission. If different disciplines prepare structural or electrical documents, identify how those documents will be checked against the sign elevations and site plan before the package is sent.
Schedule planning should distinguish design development, authority review, procurement, fabrication, site readiness, and installation. These steps may overlap only when the project team has confirmed that doing so is appropriate. Avoid promising an installation date based solely on a preliminary concept or assumed review period. A decision log helps the owner see what remains open, who must respond, and whether a choice affects approval, fabrication, or field work.
How do fabrication and installation work together?
Short answer: Fabrication and installation work best when approved drawings, site conditions, utilities, access, and responsibilities are coordinated before mobilization.
Once the design and approval path are clear, the project moves into detailed engineering, fabrication, and site coordination. The sign's support, connections, and foundation need to work with actual site conditions and the intended assembly. Utility locations, underground services, access for equipment, and ground conditions can affect how and when installation proceeds. Confirm those conditions through the project's established processes rather than relying on assumptions from a concept drawing.
Installation planning should coordinate the sign contractor with the property owner, general contractor, civil team, electrician, landscape contractor, and other affected parties. Agree on responsibilities, access, work windows, site protection, and how changes will be communicated. For an occupied campus or commercial property, consider pedestrian and vehicle movement and how installation activity will be separated from normal operations.
Before the field phase, confirm the installation handoff in writing. The installer should have the approved sign drawings, site contact details, access instructions, known work restrictions, and a process for reporting a discrepancy between the plan and actual conditions. The owner or general contractor should identify who can authorize a field adjustment. This is especially important when the sign is near utilities, an active entrance, or completed landscape work. Documenting the decision path helps avoid informal changes that could affect appearance, review conditions, or safety.
For a phased development, identify which infrastructure or site work must be complete before the sign arrives. Confirm whether the sign location will remain accessible when paving, curbs, planting, or building work is underway. Protect the sign from damage by coordinating delivery and installation with the sequence of surrounding construction. For an operating facility, agree on work hours, vehicle routing, pedestrian detours, and notification responsibilities before mobilizing.
A clear sequence commonly includes:
- Confirm approved documents: Check that the sign design, location, structural information, electrical scope, and applicable approvals are aligned.
- Verify field conditions: Coordinate site access and utilities, and confirm that the planned location remains suitable before work begins.
- Prepare the installation: Align equipment, materials, crew needs, site protection, and the work schedule with other project activity.
- Install and connect: Complete the sign assembly and any required electrical coordination in accordance with the approved project documents.
- Inspect and close out: Review the finished work, address open items, and collect relevant records, care information, and service contacts.
Each project's sequence will depend on its design and site. A single vendor managing design, permitting coordination, fabrication, electrical coordination, installation, and service can reduce the handoffs that otherwise leave gaps between trades. Review commercial sign installation services when defining the field scope, and coordinate the installation plan with the project's construction schedule.
How can you plan for service after installation?
Service planning protects the sign's function and appearance after the initial project is complete. Keep a record of approved drawings, finish selections, electrical details, equipment information, and any sign-specific operating instructions. Note who is responsible for reporting issues and who can authorize repairs or tenant-panel changes.
For an illuminated sign, establish how to report an outage and what information to provide, such as the sign location, affected section, and whether the issue is intermittent or constant. For shared property signage, assign responsibility for directory updates and confirm how replacement panels will be designed and approved. These simple processes help avoid inconsistent updates and prolonged uncertainty when a component needs attention.
Ask the project team to explain service access, expected inspection needs, and which elements are replaceable. A service plan should match the actual sign system rather than promise a generic maintenance interval. If multiple properties are involved, consistent records and a clear point of contact make it easier to coordinate service across locations. Carolina Signs and Wonders provides signage project and service capabilities that can be discussed during project planning.
What is a practical project checklist?
Before design approval, bring the property, facilities, marketing, construction, procurement, and sign teams together around a concise project brief. Record the items below and identify who has authority to approve each decision.
- Property address, jurisdiction, owner, and the authority responsible for sign review.
- Sign purpose, audiences, viewing directions, entrances, and any tenant or department hierarchy.
- Site plan information, proposed location, sightline observations, landscape coordination, and access constraints.
- Brand standards, approved colors and logos, desired materials, finish preferences, and illumination intent.
- Applicable review steps, required documents, responsible submitter, and a schedule allowance for comments and revisions.
- Structural and electrical coordination needs, field verification, installation access, and coordination with other trades.
- Future ownership of tenant updates, maintenance reporting, record retention, and service requests.
For a larger campus or a portfolio of locations, use the brief as a repeatable standard, then record local differences at each site. This preserves a recognizable identity while allowing the project team to adapt placement, approvals, and construction details to actual conditions. Explore examples of completed sign projects to inform the conversation about scale and execution, and review the company's approach to end-to-end signage projects.
For teams planning work across several locations, coordination and consistency matter as much as the design of one sign. Carolina Signs and Wonders supports multi-state project execution; learn more about installation partnerships for national sign companies when a broader rollout or field installation program is part of the scope.
Discuss your Greensboro monument sign project
Frequently Asked Questions
How early should a monument sign be planned?
Bring sign planning into early site and building coordination. Location, sightlines, permitting, structure, utilities, electrical work, and landscape design can affect one another. Early coordination gives the team more opportunity to resolve conflicts before fabrication or construction schedules are committed.
Can a monument sign identify multiple tenants?
Yes, a design can incorporate multiple occupants when the layout, property requirements, and approval path support it. Establish a clear hierarchy and a process for approving future tenant changes. A replaceable panel approach may help with updates, but the overall composition should remain readable and consistent.
Does a monument sign need illumination?
Not always. The decision depends on when the property needs identification, the surrounding lighting, viewing conditions, design intent, and applicable requirements. Compare the daytime and nighttime effect, and coordinate any electrical and illumination details with the project team and reviewing authority.
Who confirms which sign approvals apply in Greensboro?
The project team should first confirm the property's jurisdiction and then check current requirements with the appropriate authority. Greensboro's sign information page is a useful starting point for city properties, but the applicable approvals depend on the actual site and project scope. Verify requirements directly before design release or construction.
What information helps start a project discussion?
Share the property location, a site plan or entrance photographs, the sign's purpose, brand standards, desired schedule, and any known review or construction requirements. For a multi-tenant or multi-location project, include the sign hierarchy and who will manage future content changes.
Get a consultation for your monument sign project
Careful coordination turns a monument sign from a standalone object into a durable, useful part of the property. A clear brief, verified site conditions, coordinated approvals, and a service plan give project stakeholders a stronger basis for decisions from concept through installation.


